Buying a used oven can save you significant money, often allowing you to purchase a high-end model for 25-50% of its original retail price, but it requires careful inspection to avoid hidden issues. This used oven buying guide provides a step-by-step checklist to help you find a reliable, pre-loved appliance that fits your budget and kitchen needs.
Why Go Second-Hand? The Good, The Bad, and The Savvy
Why consider a used oven? It can be an excellent idea if you know what to look for. It’s similar to buying a used car: with a little expertise, you can acquire a premium model at a fraction of the cost.
The Upside:
- Major Savings: You can often get a high-end, feature-packed oven from a premium brand for the price of a new, entry-level model. This means more value for your money.
- Eco-Friendly: Giving an appliance a second life reduces waste and keeps functional machines out of landfills.
- Proven Performance: Some older models are built to last, offering simple, reliable performance that has already stood the test of time.
The Downside:
- No Warranty: Most used ovens are sold “as is,” meaning you are responsible for any repair costs if it breaks down shortly after purchase.
- Hidden Issues: Not all sellers are completely transparent. There could be underlying problems not immediately obvious.
- Wear and Tear: Expect some cosmetic scuffs or scratches. The key is to differentiate between minor cosmetic flaws and functional deal-breakers.
Your Ultimate Used Oven Buying Guide Checklist
When inspecting a potential oven, you need to be thorough. Here’s your step-by-step plan for success.
Step 1: The Homework Phase (Before You Even Leave Home)
A little preparation can prevent many headaches.
- Measure Everything: Measure your kitchen space twice, noting the width, height, and depth. Also, measure doorways and hallways to ensure the oven can be moved into your kitchen.
- Know Your Power: Determine if your kitchen is set up for a gas or an electric oven. Check your connections. Electric ovens typically require a 240-volt outlet. For gas, confirm the location of your gas line.
- Research the Model: Obtain the model number from the seller beforehand. A quick online search can reveal the user manual, common problems, and original retail price, giving you an advantage in understanding the appliance and negotiating.
Step 2: The In-Person Inspection
Be thorough, polite, and don’t be rushed during the inspection.
- The Exterior: Look beyond surface grime. Check for major dents or deep scratches, especially around the control panel or door. Inspect for rust, particularly at the base or back. Significant corrosion is a red flag.
- The Door: Open and close the oven door several times. It should feel solid and well-balanced, not loose or wobbly. Check the hinges for signs of strain.
- The Seal (Gasket): The rubber or woven seal around the oven door is crucial for temperature maintenance. Inspect it for brittleness, cracks, tears, or melted gunk. A bad seal leads to heat escape, increased energy bills, and uneven cooking, making it a deal-breaker.
- The Interior: Use a flashlight to examine the oven cavity. Check for chipped or cracked enamel coating. Ensure all racks are present and slide smoothly. Inspect heating elements (coils at the top and bottom) for blistering, cracks, or breaks.
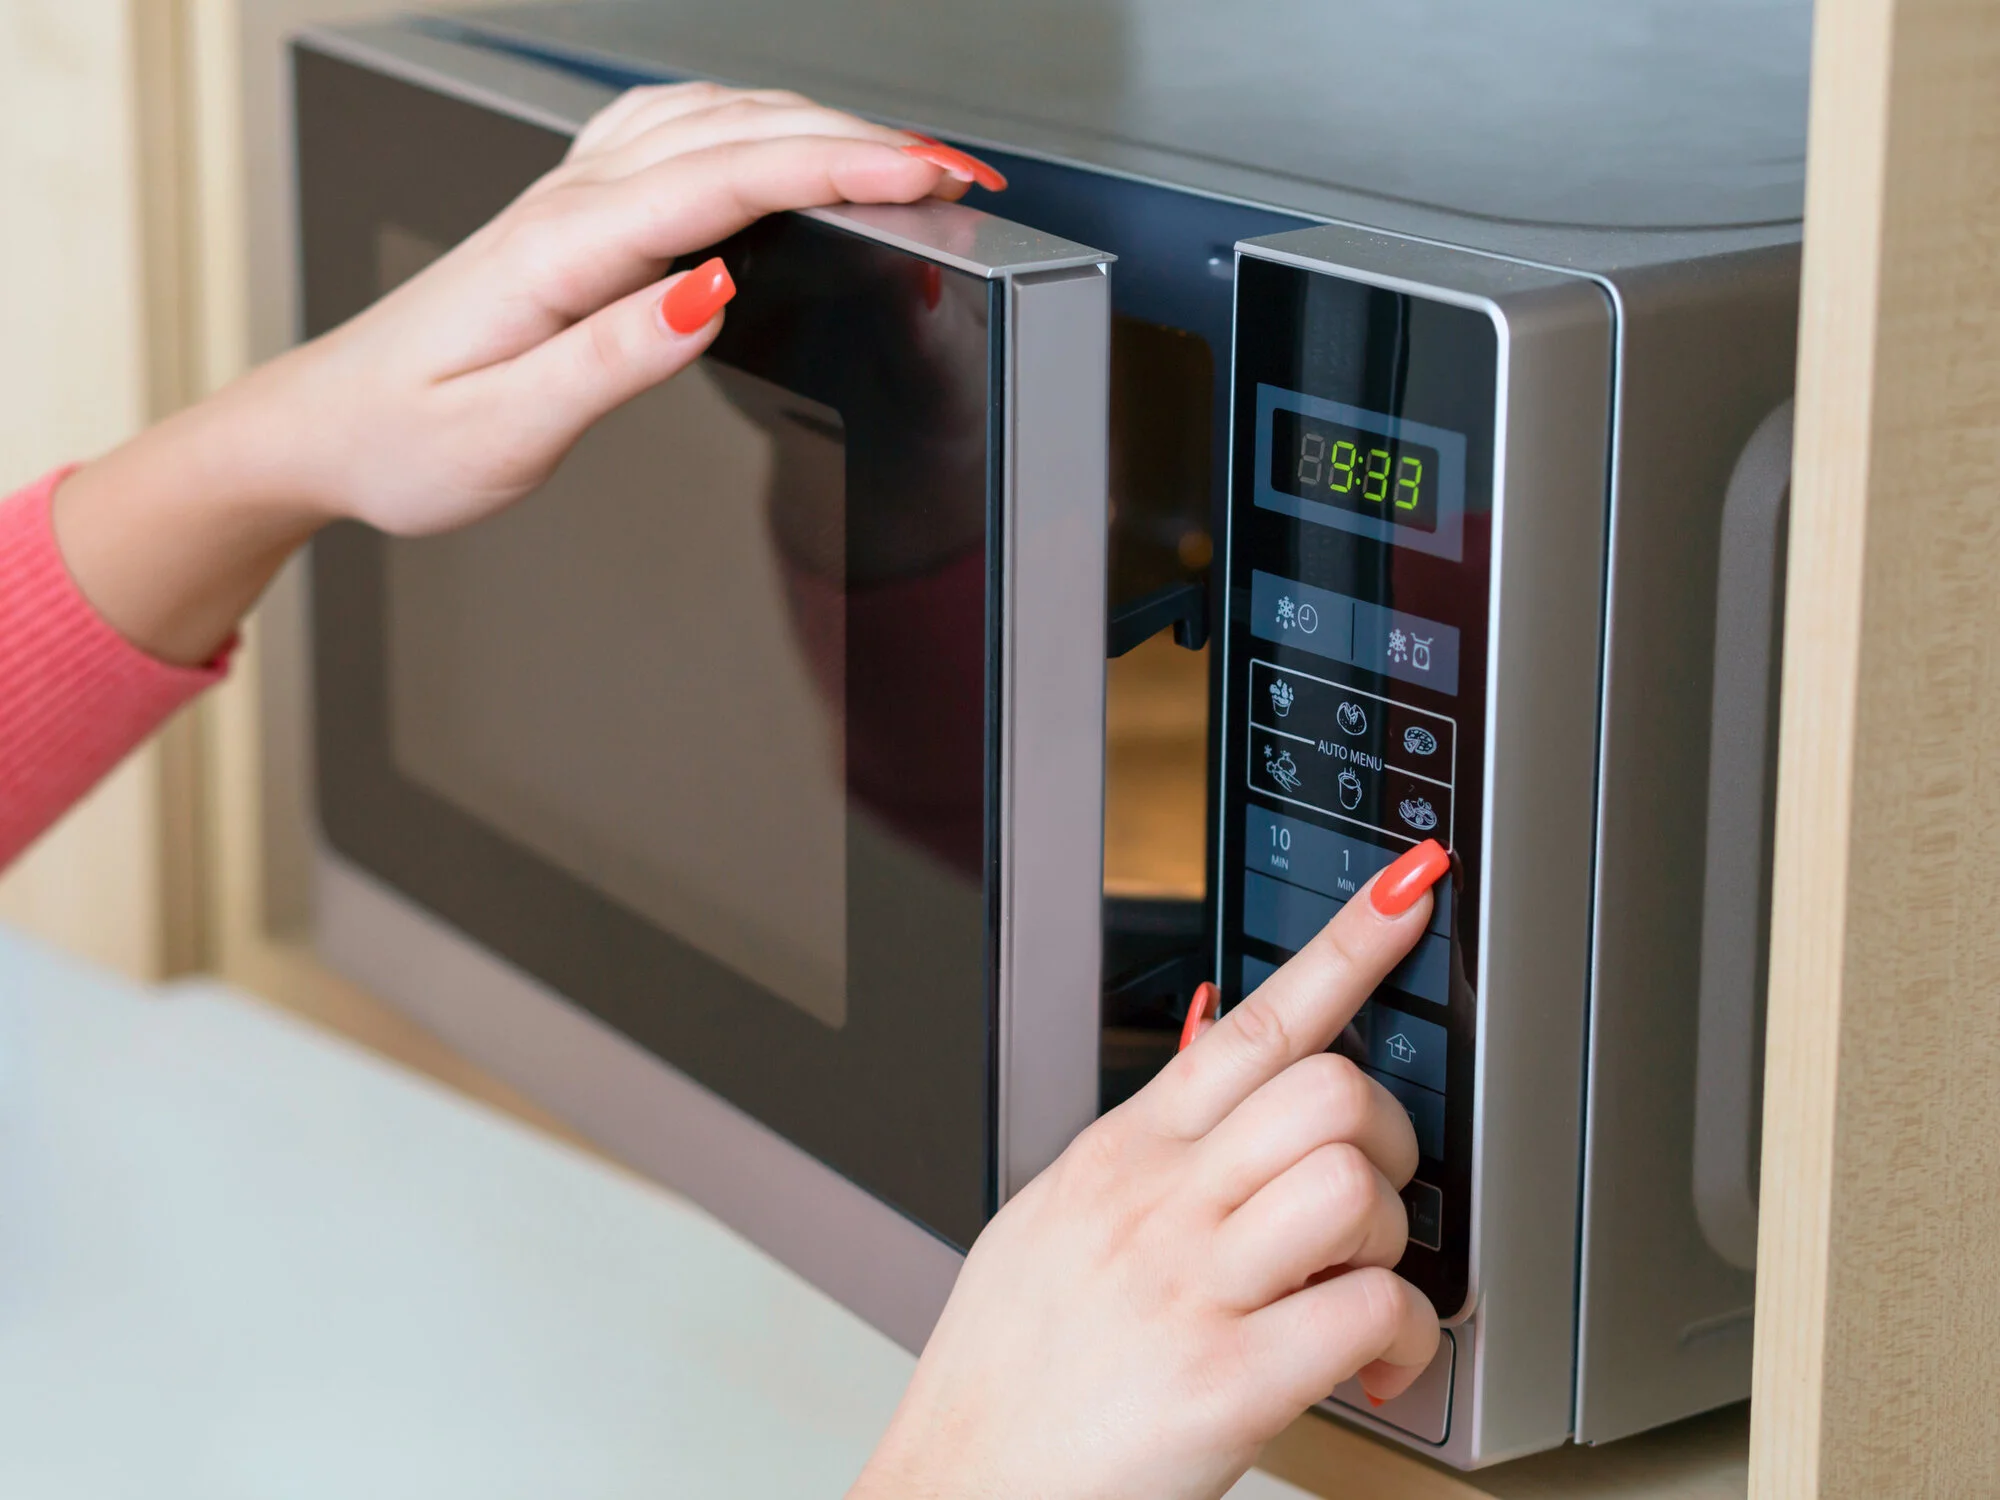
- The Knobs and Controls: Turn every knob and press every button. They should feel responsive, not sticky, loose, or unresponsive. If it has a digital display, ensure all numbers and symbols light up correctly.
According to seasoned appliance technician, John Carter, “The number one thing people forget to check is the door seal. A faulty gasket can turn a great deal into a horribly inefficient appliance. It’s a simple check that tells you a lot about how the oven was cared for.”
Step 3: The Live Test
Never buy a used oven without seeing it work. If a seller refuses a test, walk away.
- Ask the seller to plug it in or connect the gas. You need to see it in action.
- Turn it on. Set it to a baking temperature, such as 350°F (175°C).
- Listen: Listen for the gentle hum of the fan (if convection) or the click of elements. Loud buzzing, clanking, or rattling are bad signs.
- Smell: A faint, dusty smell is normal for an unused oven. A strong smell of gas (for a gas oven) or burning plastic is a major warning.
- Watch: Do the heating elements (broil and bake) glow a consistent, bright orange-red? Non-glowing spots indicate a faulty element.
- Feel the Heat: Wait 10-15 minutes for preheating. Does the preheat indicator go off? Carefully open the door. Does it feel hot inside? Hold your hand near the closed door; significant heat escaping indicates a faulty door seal.
- Test the Features: Try the convection fan, broiler, oven light, and timer. Test every feature you plan to use.
What Kind of Used Oven Should You Look For?
The “best” oven depends on your cooking style. Here are common types and specific checks:
| Oven Type | How It Works | What to Check Specifically |
|---|---|---|
| Electric Conventional | Heats with exposed or hidden elements at the top and bottom. | Check for cracks/blisters on both bake and broil elements. Ensure they both glow red when turned on. |
| Gas | Uses a gas burner at the bottom for heat. | Safety first! Check for any smell of gas. Look at the burner—does the flame ignite quickly and burn a steady blue? A yellow, sputtering flame indicates a problem. |
| Convection | Adds a fan to circulate hot air for faster, more even cooking. | Turn on the convection setting. You should hear the fan start up smoothly. Listen for any rattling or grinding noises from the fan motor. |
| Smart Ovens | Ovens with Wi-Fi connectivity and advanced digital controls. | Try to connect it to Wi-Fi if possible. At a minimum, test every single function on the digital display to ensure the control board isn’t fried. |
Simpler is often better when buying used. An oven with fewer digital components and fancy features often has fewer things that can break.
Frequently Asked Questions (FAQ)
Finding the perfect oven is about more than just cooking; it’s about building a space where memories are made, one delicious meal at a time. By following this used oven buying guide, you’re not just saving money—you’re making a smart, informed decision that will bring joy and creativity to your kitchen for years to come. Now go out there and find that hidden gem! We can’t wait to see what you’ll create.
Frequently Asked Questions
Is it safe to buy a used gas oven?
Yes, buying a used gas oven can be safe, but it requires extra caution. Always have a qualified professional install it to check for leaks and ensure correct connection. Never attempt to install it yourself unless you are certified.
Where is the best place to find a used oven?
You can find great deals on platforms like Facebook Marketplace, Craigslist, or at appliance resale stores. Resale stores often test appliances and may offer a limited warranty, providing extra peace of mind for a slightly higher price.
How much should I expect to pay for a used oven?
A good rule of thumb is to aim for 25-50% of the original retail price. This percentage depends on the oven's age, condition, and brand. Use your model number research to negotiate confidently.
Can I replace a broken part, such as a heating element, on a used oven?
Absolutely. For many common brands, parts like heating elements, knobs, and door gaskets are relatively inexpensive and easy to find online. Factor this potential cost into your offer if you identify a minor, fixable issue during inspection.
What are the major red flags when inspecting a used oven?
Major red flags include a strong smell of gas, a cracked glass cooktop (on a range), significant rust, a seller who refuses to let you test the oven, or a wobbly door with broken hinges. Always trust your gut feeling if something seems off.
How to Buy a Used Oven
Follow these steps to successfully purchase a used oven, ensuring it's in good working condition and fits your needs.
Before leaving home, measure your kitchen space, doorways, and hallways twice to ensure the oven will fit. Determine your kitchen's power setup (gas or 240-volt electric) and research the oven's model number online for manuals and common issues.
Examine the oven's exterior for major dents or rust, and check the door for wobbling or strained hinges. Crucially, inspect the door seal (gasket) for cracks or damage, as a faulty seal is a deal-breaker. Inside, look for chipped enamel, intact racks, and healthy heating elements.
Never buy without seeing the oven work. Ask the seller to plug it in or connect the gas, then turn it on to 350u00b0F (175u00b0C). Listen for strange noises, smell for gas or burning plastic, and watch for consistent glowing of heating elements. Test the convection fan, broiler, light, and timer.
Cooking gear we tested in our own kitchens
Free PDF — preheat times measured on 10 popular air fryers.
I was so nervous about buying a used oven, but this guide made it so much easier. The checklist for inspecting the heating elements and door seals was a lifesaver. I ended up finding a fantastic KitchenAid double oven for less than half the price of a new one, and it works perfectly. Definitely recommend following these steps!
Great tips, especially about checking the self-cleaning function. I almost bought a used GE Profile that looked great on the outside, but after reading this, I tested the self-clean cycle and it barely worked. Saved me a huge headache! Ended up with a different model that passed all the checks.
The advice on looking for premium brands at a discount was spot on. I found a Viking range for a great price, but even after following the inspection steps, the convection fan started making a weird noise a few weeks in. It’s still usable, but I wish I’d paid more attention to potential motor sounds during the initial check.
This guide is exactly what I needed! I’ve been wanting to upgrade my kitchen but new appliances are so expensive. The section on understanding the different types of ovens and what to look for in each was super helpful. I feel much more confident about finding a good deal on a pre-loved appliance now.